How I Styled Our Sunroom To Make The Most Of It
If you’ve been following along here for a while, you know I’m a home-design nerd so I’m pretty excited about this post! This little sunroom has been completely renovated and now it’s one of my favorite rooms in the house. (And one of the ONLY rooms that I consider completely done!) Here’s how the process went and what was behind my design decisions for this multi-functional little space…
The best “before” shots I could find!
The Before
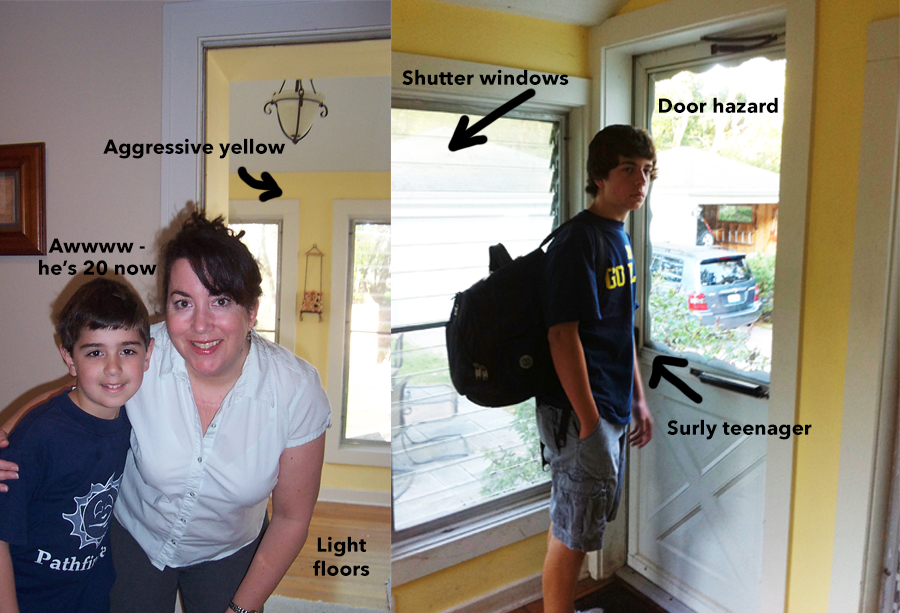
Unfortunately, I don’t have any quality “before” pictures. What few I did take were on an older phone which is no longer with us. I did manage to cobble together a couple pics explaining what once was.😂 The old crank shutter windows needed to go along with the ridiculous entry door. The door opened toward you as you came up the stairs, and I’m amazed no one met their demise tumbling down said stairs. It was a definite hazard waiting to happen. With the new door and windows, that meant new siding on the exterior. There was no light fixture over the stairs (another opportunity to go tumbling down) so that was on the list as well. There was a big, bulky coat rack above the shoe shelves and since the boys were older, I decided to ditch the rack and just hang coats inside our coat closet to reduce clutter.
This space has always doubled as a little retreat and a mudroom. The mudroom function is necessary as it’s the back entrance to our house and there is no mudroom option near the front door. But there was plenty of room to create a little oasis area to sit, relax and enjoy a morning coffee (or evening glass of wine!).
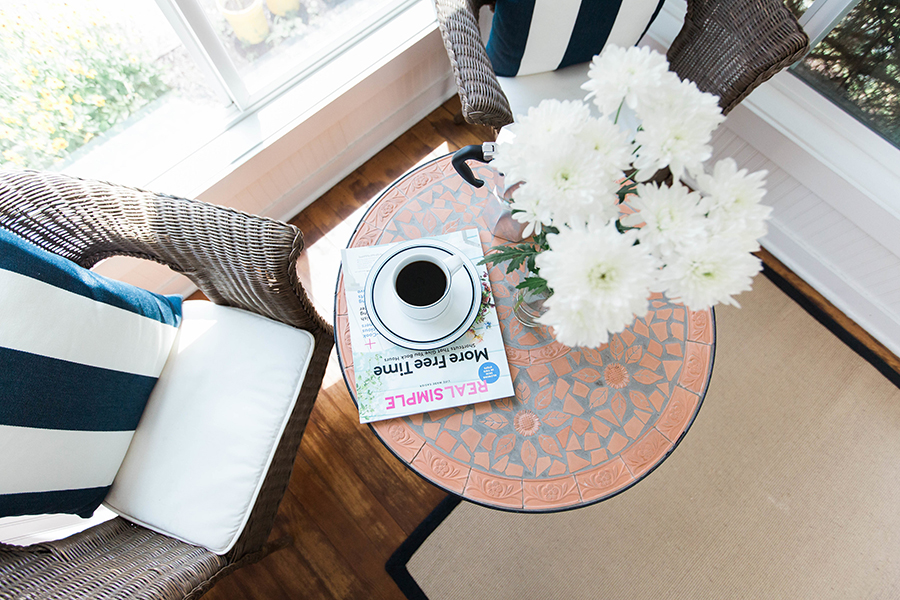
A perfect spot to enjoy coffee in the morning
The Process
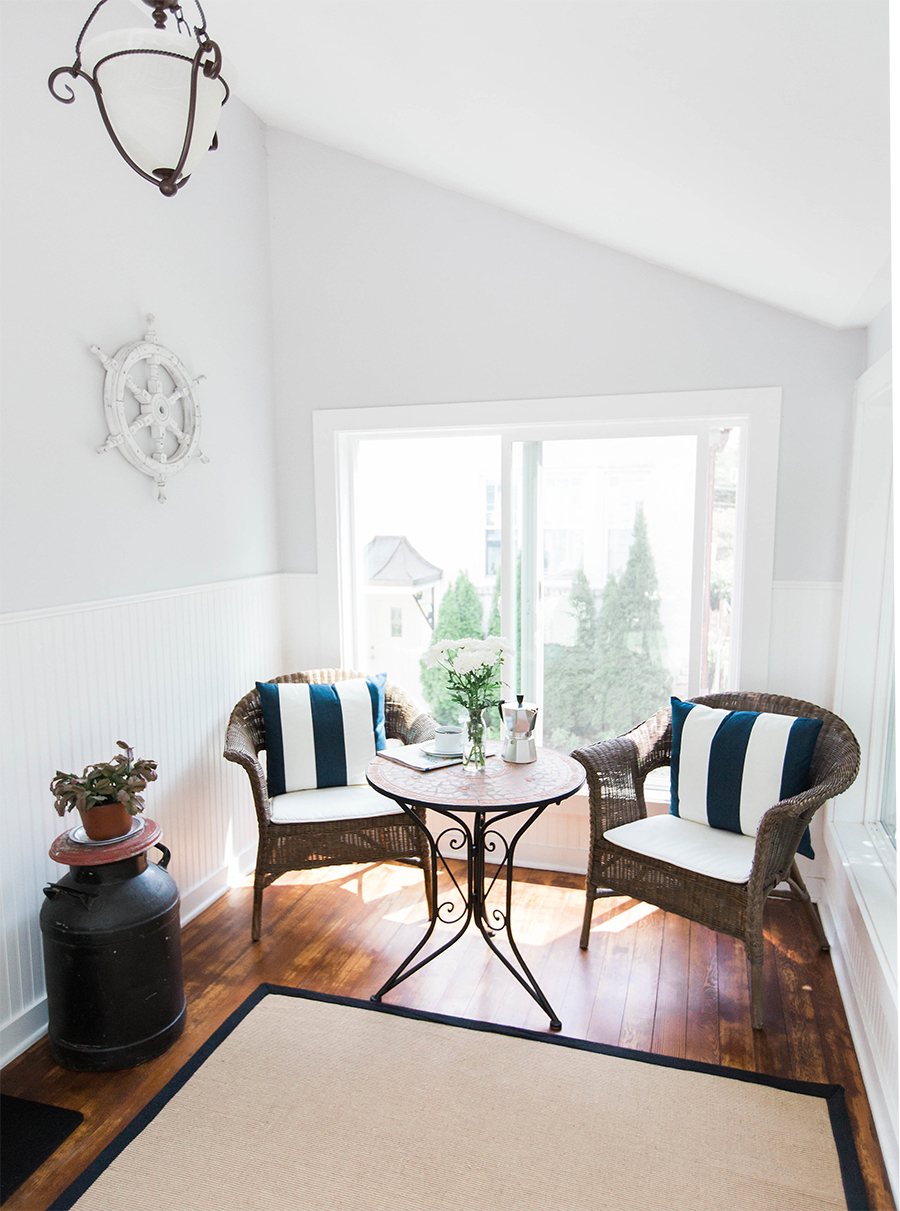
My vision for the space was a vintage look with a touch of nautical. Once I had decided on the look, we had a contractor do the major stuff. He installed new windows and added a sliding door. Then the interior walls were patched up and he added a beadboard wainscoting. We had new siding installed on the exterior, the windows were framed out and a new light fixture went over the stairs. Joe and I painted the inside and exterior ourselves. I chose a really faint gray/blue for the interior walls and went with a bright white on the trim and wainscoting. We rented a floor sander and finished the floor in a darker stain. I love that the floor came out looking rather rustic (happy accident!). Next came the fun part – decorating!
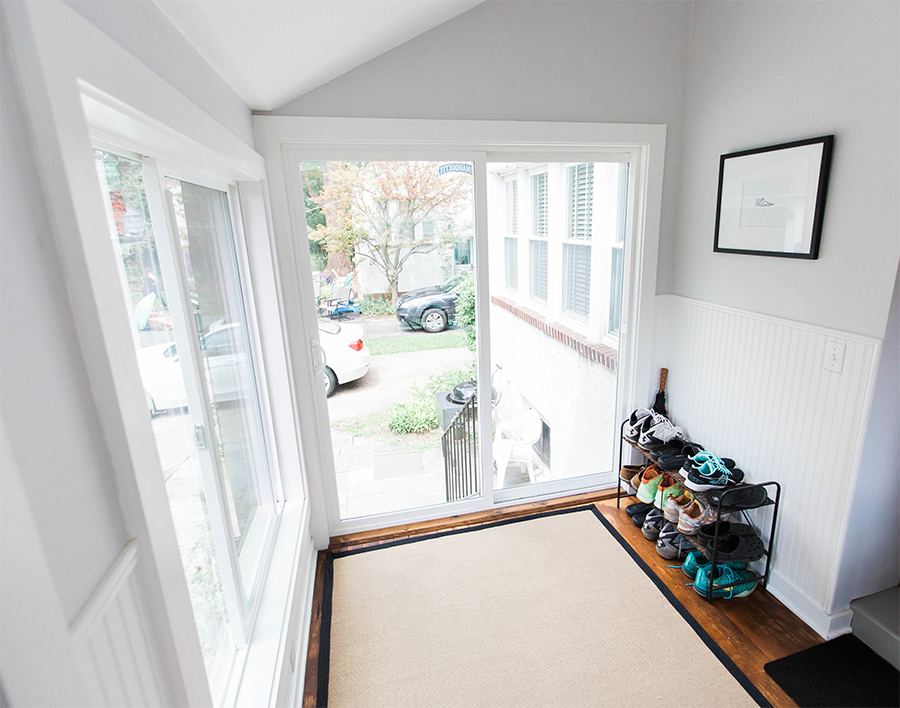
The mudroom portion of the space. Ok, basically a shoe rack!

Exterior with new siding, fresh paint and light fixture
Finishing Touches
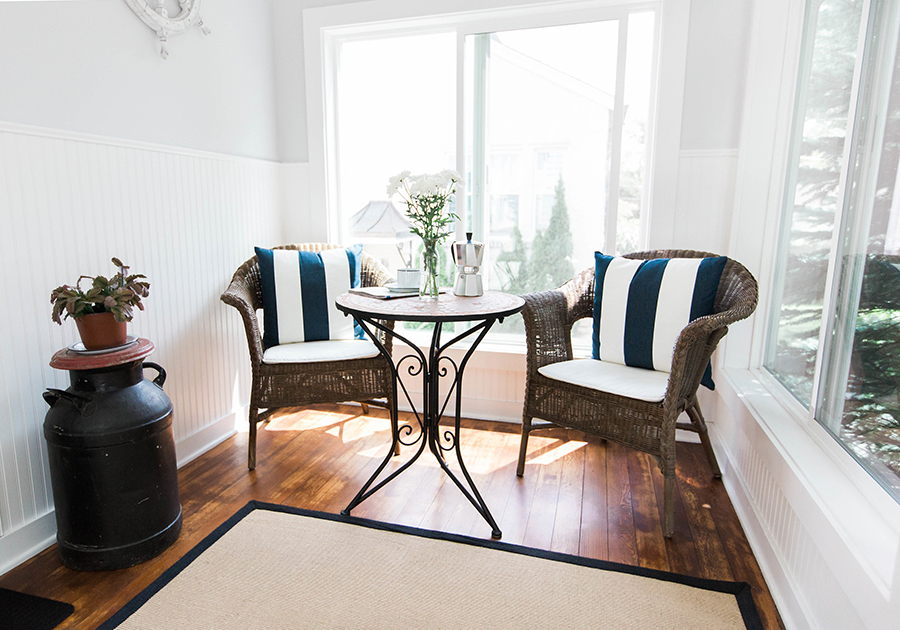
I debated between 2 chairs and a table or a small patio sofa with a coffee table. I went with chairs because it’s a little easier to eat a meal with this setup. I found the chairs and table at Pier One (years ago). The pillows are a recent purchase from Pottery Barn. I went with a lighter indoor/outdoor rug for contrast. I do switch out the rug in the winter to a darker, more weather resistant one. The ship wheel was a find on vacation in Cape Cod a few years back and the framed picture is a DIY drawing of an otter (because, who doesn’t love the cuteness of otters?! See more of my DIY drawings here). The milk jug was a vintage flea market find for $10 – score! The shoe rack helps keep the floor from becoming a shoe obstacle course (Though when the boys have friends over, there’s no getting around that!) 🙄
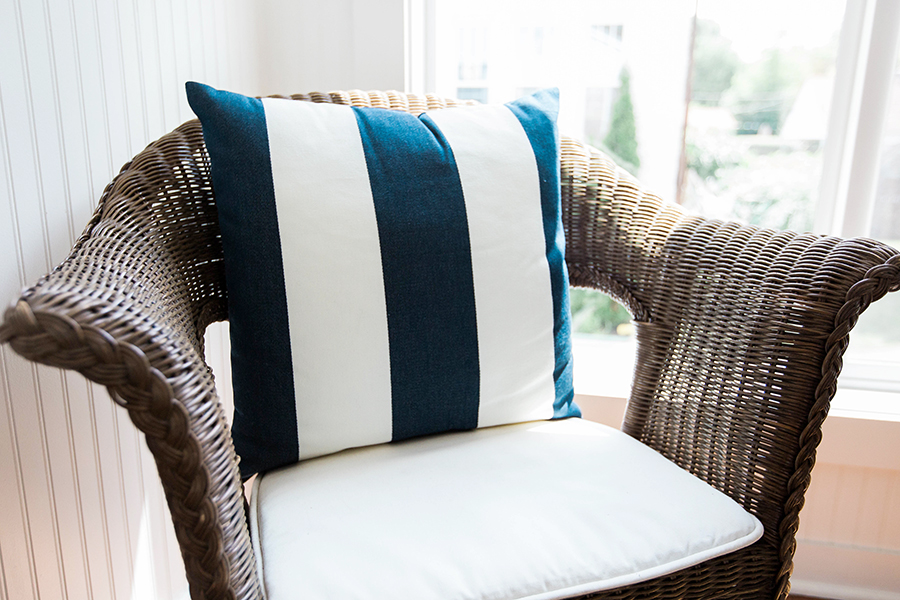
Functional and comfortable chairs
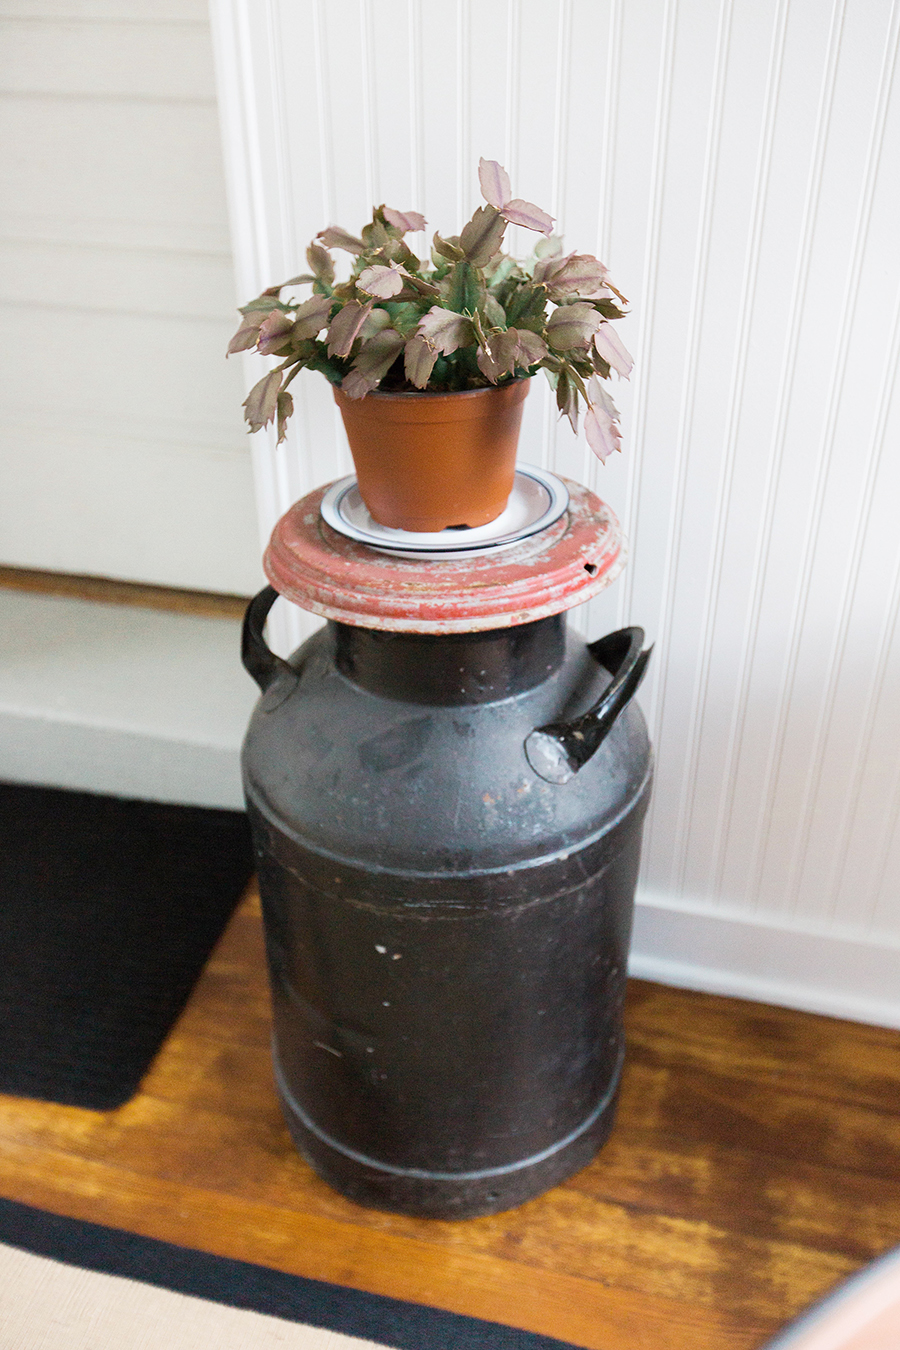
A vintage milk can serves as a plant stand or an extra side table
As I said, this is now one of my favorite spaces in our house (The master bedroom is a close second. See the transformation in progress here). The sunroom also comes in handy when we have parties. It’s right off the kitchen, so it can become an extension of the kitchen, whether it’s additional seating or extra space to have a drink station. It’s the best spot to watch thunderstorms roll in or snow fall.
You will often find me right here! 😊
I hope you enjoyed this little mini tour. Now, on to the next project! Also, I’ve linked many of the items (or similar) below–enjoy!
“After” photos courtesy of the talented Paige Babilla Photography – thanks Paige!

I love the nautical theme! Did I see you kept the original ceiling light too? It fits so well!
Thanks Liz! Yes, the light fixture was original and we like it so it stayed!